mirror of https://github.com/ceph/ceph-ansible.git
258 lines
7.1 KiB
Markdown
258 lines
7.1 KiB
Markdown
ceph-ansible
|
|
============
|
|
|
|
Ansible playbook for Ceph!
|
|
|
|
Clone me:
|
|
|
|
```bash
|
|
git clone https://github.com/ceph/ceph-ansible.git
|
|
```
|
|
|
|
## What does it do?
|
|
|
|
General support for:
|
|
|
|
* Monitors
|
|
* OSDs
|
|
* MDSs
|
|
* RGW
|
|
|
|
More details:
|
|
|
|
* Authentication (cephx), this can be disabled.
|
|
* Supports cluster public and private network.
|
|
* Monitors deployment. You can easily start with one monitor and then progressively add new nodes. So can deploy one monitor for testing purpose. For production, I recommend to always use an odd number of monitors, 3 tends to be the standard.
|
|
* Object Storage Daemons. Like the monitors you can start with a certain amount of nodes and then grow this number. The playbook either supports a dedicated device for storing the journal or both journal and OSD data on the same device (using a tiny partition at the beginning of the device).
|
|
* Metadata daemons.
|
|
* Collocation. The playbook supports collocating Monitors, OSDs and MDSs on the same machine.
|
|
* The playbook was validated on Debian Wheezy, Ubuntu 12.04 LTS and CentOS 6.4.
|
|
* Tested on Ceph Dumpling and Emperor.
|
|
* A rolling upgrade playbook was written, an upgrade from Dumpling to Emperor was performed and worked.
|
|
|
|
|
|
## Configuring Ceph
|
|
|
|
The supported method for defining your ceph.conf is to use the `ceph_conf_overrides` variable. This allows you to specify configuration options using
|
|
an INI format. This variable can be used to override sections already defined in ceph.conf (see: `roles/ceph-common/templates/ceph.conf.j2`) or to provide
|
|
new configuration options. The following sections in ceph.conf are supported: [global], [mon], [osd], [mds] and [rgw].
|
|
|
|
An example:
|
|
|
|
```
|
|
ceph_conf_overrides:
|
|
global:
|
|
foo: 1234
|
|
bar: 5678
|
|
osd:
|
|
osd mkfs type: ext4
|
|
```
|
|
|
|
**Note:** we will no longer accept pull requests that modify the ceph.conf template unless it helps the deployment. For simple configuration tweaks
|
|
please use the `ceph_conf_overrides` variable.
|
|
|
|
## Setup with Vagrant using virtualbox provider
|
|
|
|
* Create vagrant_variables.yml
|
|
|
|
```
|
|
$ cp vagrant_variables.yml.sample vagrant_variables.yml
|
|
```
|
|
|
|
* Create site.yml
|
|
|
|
```
|
|
$ cp site.yml.sample site.yml
|
|
```
|
|
|
|
* Create VMs
|
|
|
|
```
|
|
$ vagrant up --no-provision --provider=virtualbox
|
|
$ vagrant provision
|
|
...
|
|
...
|
|
...
|
|
____________
|
|
< PLAY RECAP >
|
|
------------
|
|
\ ^__^
|
|
\ (oo)\_______
|
|
(__)\ )\/\
|
|
||----w |
|
|
|| ||
|
|
|
|
|
|
mon0 : ok=16 changed=11 unreachable=0 failed=0
|
|
mon1 : ok=16 changed=10 unreachable=0 failed=0
|
|
mon2 : ok=16 changed=11 unreachable=0 failed=0
|
|
osd0 : ok=19 changed=7 unreachable=0 failed=0
|
|
osd1 : ok=19 changed=7 unreachable=0 failed=0
|
|
osd2 : ok=19 changed=7 unreachable=0 failed=0
|
|
rgw : ok=20 changed=17 unreachable=0 failed=0
|
|
```
|
|
|
|
Check the status:
|
|
|
|
```bash
|
|
$ vagrant ssh mon0 -c "sudo ceph -s"
|
|
cluster 4a158d27-f750-41d5-9e7f-26ce4c9d2d45
|
|
health HEALTH_OK
|
|
monmap e3: 3 mons at {ceph-mon0=192.168.0.10:6789/0,ceph-mon1=192.168.0.11:6789/0,ceph-mon2=192.168.0.12:6789/0}, election epoch 6, quorum 0,1,2 ceph-mon0,ceph-mon1,ceph-mon
|
|
mdsmap e6: 1/1/1 up {0=ceph-osd0=up:active}, 2 up:standby
|
|
osdmap e10: 6 osds: 6 up, 6 in
|
|
pgmap v17: 192 pgs, 3 pools, 9470 bytes data, 21 objects
|
|
205 MB used, 29728 MB / 29933 MB avail
|
|
192 active+clean
|
|
```
|
|
|
|
To re-run the Ansible provisioning scripts:
|
|
|
|
```bash
|
|
$ vagrant provision
|
|
```
|
|
|
|
## Specifying fsid and secret key in production
|
|
|
|
The Vagrantfile specifies an fsid for the cluster and a secret key for the
|
|
monitor. If using these playbooks in production, you must generate your own `fsid`
|
|
in `group_vars/all` and `monitor_secret` in `group_vars/mons`. Those files contain
|
|
information about how to generate appropriate values for these variables.
|
|
|
|
## Specifying package origin
|
|
|
|
By default, ceph-common installs from Ceph repository. However, you
|
|
can set `ceph_origin` to "distro" to install Ceph from your default repository.
|
|
|
|
## Setup for Vagrant using libvirt provider
|
|
|
|
* Create vagrant_variables.yml
|
|
|
|
```
|
|
$ cp vagrant_variables.yml.sample vagrant_variables.yml
|
|
```
|
|
|
|
* Edit `vagrant_variables.yml` and setup the following variables:
|
|
|
|
```yml
|
|
memory: 1024
|
|
disks: "[ '/dev/vdb', '/dev/vdc' ]"
|
|
vagrant_box: centos/7
|
|
```
|
|
|
|
* Create site.yml
|
|
|
|
```
|
|
$ cp site.yml.sample site.yml
|
|
```
|
|
|
|
* Create VMs
|
|
|
|
```
|
|
$ sudo vagrant up --no-provision --provider=libvirt
|
|
$ sudo vagrant provision
|
|
```
|
|
|
|
## Setup for Vagrant using parallels provider
|
|
|
|
* Create vagrant_variables.yml
|
|
|
|
```
|
|
$ cp vagrant_variables.yml.sample vagrant_variables.yml
|
|
```
|
|
|
|
* Edit `vagrant_variables.yml` and setup the following variables:
|
|
|
|
```yml
|
|
vagrant_box: parallels/ubuntu-14.04
|
|
```
|
|
|
|
* Create site.yml
|
|
|
|
```
|
|
$ cp site.yml.sample site.yml
|
|
```
|
|
|
|
* Create VMs
|
|
|
|
```
|
|
$ vagrant up --no-provision --provider=parallels
|
|
$ vagrant provision
|
|
```
|
|
|
|
### For Debian based systems
|
|
|
|
If you want to use "backports", you can set "true" to `ceph_use_distro_backports`.
|
|
Attention, ceph-common doesn't manage backports repository, you must add it yourself.
|
|
|
|
|
|
# Want to contribute?
|
|
|
|
Read this carefully then :).
|
|
The repository centralises all the Ansible roles.
|
|
The roles are all part of the Galaxy.
|
|
We love contribution and we love giving visibility to our contributors, this is why all the **commits must be signed-off**.
|
|
|
|
## Submit a patch
|
|
|
|
To start contriuting just do:
|
|
|
|
```
|
|
$ git checkout -b my-working-branch
|
|
$ # do your changes #
|
|
$ git add -p
|
|
```
|
|
|
|
One more step, before pushing your code you should run a syntax check:
|
|
|
|
```
|
|
$ ansible-playbook -i dummy-ansible-hosts test.yml --syntax-check
|
|
```
|
|
|
|
If your change impacts a variable file in a role such as `roles`ceph-common/defaults/main.yml`, you need to generate a `group_vars` file:
|
|
|
|
```
|
|
$ ./generate_group_vars_sample.sh
|
|
```
|
|
|
|
You are finally ready to push your changes on Github:
|
|
|
|
```
|
|
$ git commit -s
|
|
$ git push origin my-working-branch
|
|
```
|
|
|
|
Worked on a change and you don't want to resend a commit for a syntax fix?
|
|
|
|
```
|
|
$ # do your syntax change #
|
|
$ git commit --amend
|
|
$ git push -f origin my-working-branch
|
|
```
|
|
|
|
# Testing PR
|
|
|
|
Go on the github interface and submit a PR.
|
|
|
|
Now we have 2 online CIs:
|
|
|
|
* Travis, simply does a syntax check
|
|
* Jenkins Ceph: bootstraps one monitor, one OSD, one RGW
|
|
|
|
If Jenkins detects that your commit broke something it will turn red.
|
|
You can then check the logs of the Jenkins by clicking on "Testing Playbooks" button in your PR and go to "Console Output".
|
|
You can now submit a new commit/change that will update the CI system to run a new play.
|
|
|
|
It might happen that the CI does not get reloead so you can simply leave a comment on your PR with "test this please" and it will trigger a new CI build.
|
|
|
|
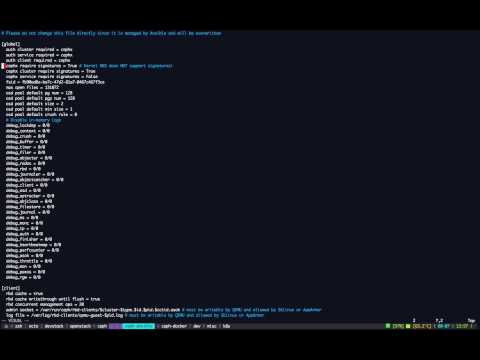
## Vagrant Demo
|
|
|
|
[](https://youtu.be/E8-96NamLDo "Deploy Ceph with Ansible (Vagrant demo)")
|
|
|
|
|
|
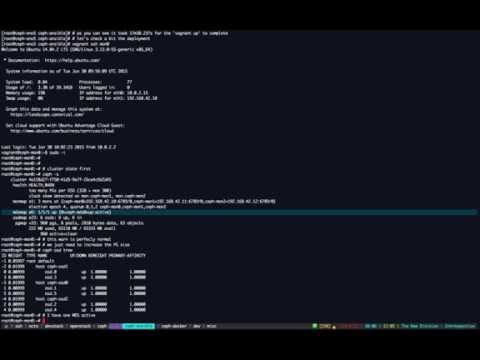
## Bare metal demo
|
|
|
|
Deployment from scratch on bare metal machines:
|
|
|
|
[](https://youtu.be/dv_PEp9qAqg "Deploy Ceph with Ansible (Bare metal demo)")
|